When it comes to creating outstanding sound productions, attention to detail is key. From investing in quality headphones to employing effective mixing techniques, every step contributes to the overall sonic experience.
In this article, we will explore expert tips and tricks that can take your mixing skills to the next level.
By implementing these mixing and mastering tips and tricks, you can enhance the clarity, depth, and balance of your mixes. You can ensure they stand out in the competitive music industry.
Let’s jump in.
Tip 1: Elevate Your Listening Experience with Quality Headphones
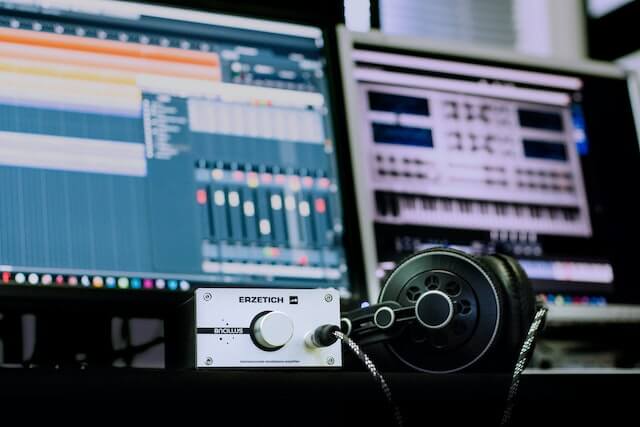
Investing in top-notch headphones is a crucial first step in the pursuit of exceptional sound.
With headphones like the Sennheiser 650s or alternatives such as the ATH-M50XBT2 and Beyerdynamic DT-770 or DT-1990, you can unlock a new level of audio precision.
By being able to discern intricate details that might have previously eluded you, you can make more informed adjustments and optimizations during the mixing process.
Tip 2: Use Reference Tracks for Mix Comparison
One practice embraced by accomplished producers is referencing other music during the mix.
By loading a reference track into your DAW that closely matches the vibe and instrumentation of your own project, you gain invaluable insights.
To ensure accurate comparison, attenuate the reference track’s volume by approximately 12dB peak, as it has already been mastered.
Additionally, employing a spectrum analyzer alongside your ears can provide both visual and auditory cues for refining your mix.
Tip 3: Achieve Balance and Clarity in Mono
The stereo image can sometimes obscure transient and frequency details, making it harder to discern the intricacies of your mix.
To overcome this, temporarily switch your master channel to mono and evaluate your mix’s cohesiveness.
By focusing solely on mono sound reproduction, you can ensure that your mix maintains its quality and impact, even when played back in stereo.
Tip 4: Employ a Hierarchical Approach to Mixing

When confronted with a multitude of tracks, it’s essential to approach the mix in a structured manner. Begin by focusing on the most crucial elements and gradually work your way down the hierarchy.
For instance, in dance music, start with the kick, then introduce the bass, followed by the clap or snare, and gradually incorporate additional elements such as vocals and hats.
This systematic approach allows you to maintain control over the mix while ensuring that each element finds its place in the sonic landscape.
Tip 5: Optimize Headroom by Anchoring the Kick
To avoid potential clipping issues and maintain ample headroom on your master channel, set the peak level of your kick to approximately -10dB.
By establishing the kick as the anchor and subsequently mixing other elements around it, you can ensure a well-balanced and dynamic mix.
Tip 6: Enhance Clarity with High-Pass EQ
Clearing up the low-end frequencies in your mix is crucial for achieving a tight and defined sound.
Apply a high-pass EQ to every element, excluding the kick and bass, setting the cutoff point at a minimum of 100Hz (or higher depending on the instrument).
This technique helps eliminate muddiness and allows your kick and bass to occupy the low-frequency range more effectively.
Tip 7: Separate Sub Bass for Greater Control
Dedicating a separate mixer channel to the sub-bass offers enhanced control and flexibility. By doing so, you can better balance the low-end frequencies.
You can also adjust the stereo width of both the main bass and sub-bass independently.
You can achieve this by either using a second synth for the sub-bass or splitting the signal of your bass instrument in your DAW.
Apply a high-pass filter to your main bass, allowing frequencies below 120Hz to pass through, while low-passing everything above 120Hz for the sub-bass.
This separation allows for precise manipulation and ensures that each element of the bass spectrum has its designated space in the mix.
Tip 8: Enhance Low-End Cohesion with Kick & Bass Buss
Achieving a cohesive and powerful low-end is crucial for a solid mix. By routing your kick and bass to a single buss track, you can apply subtle saturation and compression to fuse them together.
This technique adds thickness and solidity to the low-frequency foundation of your mix, providing a strong backbone for other elements to sit upon.
Tip 9: Harness the Power of Auxiliary Channels for Spatial Effects
Spatial effects such as reverb and delay can add depth and dimension to your mix. Using auxiliary channels for these effects grants you greater control and flexibility.
By processing the wet signal separately from the dry signal, you can fine-tune the effect parameters and tailor them to specific elements of your mix.
Using EQ on the auxiliary channel allows you to sculpt the frequency content of the spatial effects, ensuring they blend seamlessly with the rest of the mix.
Tip 10: Optimize Vocal Reverb with Side-Chain Compression

For vocals that demand prominence and clarity, employing side-chain compression on the auxiliary reverb channel can yield impressive results.
By side-chaining the reverb from the dry vocal signal, you create space for the vocals to shine through while maintaining a sense of ambiance.
This technique pushes the reverb slightly out of the way when the dry vocals are present and allows it to fill the gaps between vocal phrases, resulting in a polished and intelligible vocal sound.
Tip 11: Create a Sense of Unity with Room Reverb
To enhance the cohesion and spatial cohesiveness of your mix, consider incorporating a short room reverb on an auxiliary channel.
This technique works wonders, especially with individual drum sounds, by imparting a subtle sense of shared space.
Blending a small amount of most elements in your mix with this room reverb, you can create a unified sonic environment that feels natural and cohesive.
Tip 12: Add Depth and Warmth with Saturation
Saturation is a powerful tool for adding depth, warmth, and perceived loudness to your mix.
When applied tastefully at the group level, saturation can help glue together various elements, enhancing their harmonic content and overall impact.
Experiment with different saturation techniques and plugins to find the perfect balance that elevates your mix while preserving clarity and definition.
Tip 13: Ensure Mix Consistency Across Different Playback Systems
To ensure your mix translates well across various playback systems, it’s crucial to check its performance on multiple platforms.
Different systems accentuate or attenuate certain frequencies, affecting the overall tonal balance.
One effective tool for achieving this is MixChecker, which allows you to simulate the sound of your mix on different systems.
If you have access to multiple monitoring options in your studio, it will help immensely.
You can regularly switch between them to provide valuable insights into how your mix translates to different listening environments.
Tip 14: Expand Your Skills by Mixing for Others

One of the most effective ways to refine your mixing abilities is by working on projects for other artists. This experience broadens your understanding of music and exposes you to different genres and production styles.
It also allows you to develop problem-solving skills and deliver commercially viable mixes.
With platforms like Fiverr and Soundbetter, you can easily offer your mixing services to a wide range of musicians.
While it’s beneficial to build your portfolio by taking on a few projects for free initially, it’s important to establish your value and charge fair rates for your expertise.
Conclusion
By implementing these expert mixing tips and techniques, you can elevate the quality of your mixes. This will help establish yourself as a proficient and sought-after mixing engineer.
Embrace the opportunities to collaborate with different artists and genres. Use online platforms to showcase your portfolio and attract clients.
Remember, honing your skills and providing exceptional mixes is not only personally fulfilling but can also open doors for new career prospects and monetization of your expertise.
Related Posts:
Why Are My Mixes So Quiet? (Answered)
Are Real Instruments Better Than Virtual Instruments? (5 Considerations)
Are Ableton Live Stock Plugins Good Enough? (Checked)
10 Tips for Mastering if You’re Not a Mastering Engineer

Mike is a skilled musician, guitar technician, and music producer with a passion for audio and gear. He excels in teaching guitar, editing podcasts/videos, and creating captivating soundscapes using cutting-edge hardware, software, and plugins. Mike’s talent and commitment make him highly sought-after in the industry, inspiring fellow musicians worldwide.


